MUA Corner: The 411 On Makeup Junkie Hosted Workshops!
This is almost a month late, but this Makeup Junkie has been a busy girl! If you've been keeping up with my blog then you've read I've started hosting workshops for some of my favourite makeup artists who are the "who's who" in the industry. If you really want to be successful in the business of makeup artistry I recommend taking notes from a pro and not just any old amature.

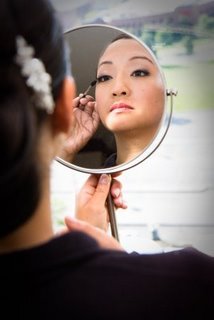
Photo Courtesy of Elaine from TorontoBeautyReviews.
On February 5th, I hosted a bridal makeup workshop alongside Dior Canada for Dior's Senior Artist, Fredis Velasquez. He not only is uber talented and can work magic with his brush, but he's also an old friend. I knew immediately the workshop attendees would love him and learn some major tips that would change their careers.

Photo Courtesy of Elaine from TorontoBeautyReviews.
Fredis' was fantastic! He was funny, friendly, and extremely knowledgeable. What I think stood out most was that he went to each artist and asked what their biggest makeup difficulty was. He worked one-on-one with each artist providing positive and constructive feedback and tips. Every MUA I spoke to couldn't wait for the next workshop with Fredis! We even went a half hour overtime - that's how dedicated Fredis was to his students. He wanted to make sure each person walked away learning many valuable tips.

Photo Courtesy of Elaine from TorontoBeautyReviews.
There were a few familiar faces that attended including Donna Marie (read about her experience here), Naomi from StylEyes, Jill Oliver from Batting A Lash, Sarah Kirmani (Facebook Friend), and of course my lovely guest blogger, Elaine from Toronto Beauty Reviews.

Sarah Kirmani and her lovely model Elaine! Photo courtesy of Elaine TorontoBeautyReviews.
Each attendee and their guest received an amazing gift bag from Dior which included 2 lip products I am obsessed with right now (review to come)! Thank you to Fredis and Dior Canada for being apart of Makeup Junkie's first ever workshop!
Intrigued? You should be because the next workshop is coming up on March 25th! If you're a MUA in the Toronto area this is one workshop not to be missed! One of my favourite makeup artists, Lucky Bromhead, will be teaching a workshop on HD makeup for print, television, and more. Not only does she have many years of experience working with celebrities and in television, but she is actually working in the industry and is successful! Part of this business is making smart moves and attending Lucky's workshop is definitely a smart one. So be there or be square.

I'm hosting this workshop with the lovely people at Make Up For Ever Canada and each attendee will receive a gift bag with some of their best-selling products! To purchase your early bird tickets and for more information visit: http://makeupwithluckyb.eventbrite.ca/ . Only until March 21st!